The first time I photographed a monsoon storm over Udaipur's Lake Pichola, I ruined a camera. The rain came sideways, the wind knocked my tripod over, and by the time I scrambled to recover everything, the lens was fogged and the sensor was spotted with water droplets. I was furious — until I looked at the images on my backup body and realized I had captured something extraordinary: lightning splitting the sky above the Lake Palace, reflected in churning water, with the old city's rooftops glowing amber in the fading light. That moment changed how I think about weather photography. Bad weather is not a problem to avoid. It is the best light you will ever shoot in.
"Bad weather makes good photographs." — David Alan Harvey
Monsoon Photography in India: Where the Drama Lives
India's monsoon season, which runs from June to September, transforms the subcontinent into a photographer's paradise. The skies become enormous canvases of cumulonimbus clouds, the light shifts every few minutes as storms roll through, and the saturated colors of wet earth, green vegetation, and reflections on water create a palette that simply does not exist in the dry season. My favorite monsoon destination is Udaipur in Rajasthan, where the lake system and the white marble architecture of the Lake Palace and City Palace create stunning reflections during and after rain. The monsoon typically arrives in Udaipur in late June or early July, and the period from mid-July to mid-August offers the most dramatic skies.
Mumbai during the monsoon is raw and exhilarating. The city receives an average of 2,400 millimeters of rain between June and September, and when a heavy downpour hits, the streets flood within minutes, creating mirror-like reflections of buildings, vehicles, and people. Marine Shape, the curved promenade along the Arabian Sea, becomes a theater of wind and spray during high tide combined with monsoon rain. I shot some of my favorite street photographs there — commuters huddled under a single umbrella, newspaper vendors wrapping their stacks in plastic, children splashing through ankle-deep water while their parents shouted from doorways. The key is to find shelter with a clear view and wait for the light to break between storms. The moments just after a downpour, when the sun emerges through gaps in the clouds and the wet surfaces reflect everything, produce the most vivid colors.
Kerala, on India's southwestern coast, offers a different kind of monsoon photography. The backwaters around Alleppey and Kumarakom become shrouded in mist during the southwest monsoon, and the traditional houseboats (kettuvallams) that glide through the canals take on an almost ghostly quality in the low light. The tea plantations of Munnar, in the Western Ghats, are often wrapped in clouds during the monsoon, with visibility dropping to a few dozen meters. This fog creates natural layers and depth that are impossible to replicate. I shot a series there using a 70-200mm lens at f/2.8, focusing on tea pickers emerging from and disappearing into the mist, and the compressed perspective of the telephoto lens made the layers of fog look like painted backdrops. A homestay in Munnar costs about 2,000 to 3,000 rupees ($25 to $35) per night during the monsoon, and the owners can arrange transport to the plantations before dawn.
Protecting Your Gear in Extreme Weather
Shooting in heavy rain, wind, and humidity requires serious gear protection, and the investment is modest compared to the cost of replacing a water-damaged camera. A rain cover for your camera body and lens is essential — I use the Think Tank Hydrophobia, which costs about $70 and fits most DSLR and mirrorless setups with lenses up to 70-200mm. The cover has a sealed eyepiece opening so you can shoot through it without exposing the camera to rain. For shorter lenses, a simple Op/Tech Rainsleeve (about $7 for a pack of two) works well and weighs almost nothing. Carry several of them and replace them when they get saturated.
Silica gel packets are your best friend in humid conditions. Camera bags absorb moisture from the air, and in tropical monsoon climates, the humidity inside a closed bag can reach 90 percent within hours. I keep a dozen silica gel packets in my camera bag and replace them every two days — you can tell they are saturated when they change color from blue to pink. In a pinch, uncooked rice in a small cloth bag works as a desiccant. After a day of shooting in the rain, wipe down your camera body and lens with a microfiber cloth, remove the lens, and wipe the lens mount and contacts. Leave the camera body open in a dry, air-conditioned room overnight to let any residual moisture evaporate.
Your biggest risk is not rain but condensation. Moving from a cold, air-conditioned hotel room to a hot, humid outdoor environment causes condensation to form on every surface of your camera, including the lens elements and the sensor. To avoid this, place your camera bag in a sealed plastic bag before leaving the air-conditioned room, and let it sit outside for 15 to 20 minutes until the bag reaches ambient temperature. Then open the bag and start shooting. The same principle applies in reverse when coming in from the cold — seal the camera in a bag before entering a warm room. This simple habit has saved me from fogged lenses and moisture spots on more occasions than I can count.
Storm Photography: Lightning, Clouds, and Drama
Lightning photography requires patience, a steady tripod, and a basic understanding of exposure. The technique is straightforward: set your camera on a tripod, point it at the area of the sky where lightning is occurring, set a long exposure (5 to 30 seconds), and shoot continuously. The long exposure captures any lightning bolt that fires during the shutter-open period. I use manual mode with an aperture of f/8 to f/11, ISO 200, and shutter speeds of 10 to 20 seconds. Focus manually on a distant point — autofocus will not work in darkness. A wide-angle lens (16-35mm or 24-70mm) captures more of the sky and increases your chances of catching a bolt within the frame.
Safety is non-negotiable when photographing storms. Lightning kills roughly 2,000 people worldwide each year, and standing in the open with a metal tripod during an electrical storm is extremely dangerous. Shoot from inside a building or a car whenever possible — the metal body of a car acts as a Faraday cage and directs lightning around the occupants. If you must shoot outside, stay at least 100 meters from tall objects like trees, power poles, and towers, and be prepared to abandon your gear and seek shelter immediately if you feel your hair standing on end or hear a buzzing sound, which are signs that a strike is imminent. No photograph is worth your life.
Cloud structure is often more photogenic than the storm itself. The undersides of cumulonimbus clouds, called the anvil and the mammatus formations, create surreal textures and shapes that look like something from a science fiction film. Mammatus clouds, which appear as pouches or lobes hanging from the base of a cloud, typically form after a thunderstorm has passed and the sky is clearing. They are most common in the Great Plains of the United States during spring and summer storm season. I photographed mammatus clouds over Salina, Kansas, during a storm chase in May, using a 24mm lens at f/8 and a shutter speed of 1/250 second to freeze the cloud motion. The light was extraordinary — golden sunset light illuminating the undersides of the pouches from below, with the dark storm retreating in the background.
Fog and Mist: Soft Light, Strong Images
Fog transforms ordinary Scene into something ethereal and otherworldly, and it is one of the easiest weather conditions to photograph because the light is soft and even. The best fog forms in the early morning, often just before or after sunrise, when the ground temperature drops below the dew point. Coastal fog is common in San Francisco, Namibia's Skeleton Coast, and the Scottish Highlands. Valley fog forms in low-lying areas after rain, especially in autumn. Mountain fog, or cloud seas, form when moist air is pushed up mountain slopes and cools below the dew point — the Dolomites in Italy and the Blue Mountains in Jamaica are famous for this effect.
Shooting in fog requires different exposure thinking than normal conditions. Camera meters tend to overexpose fog because they try to make the scene a neutral grey, but fog is inherently bright. Dial in negative exposure compensation of -0.5 to -1.0 stops to preserve the subtle tonal variations in the fog and prevent blown-out highlights. Shoot in RAW format, which gives you more latitude to recover highlights and shadows in post-processing. A polarizing filter can reduce glare on wet surfaces in foggy conditions, but it also reduces the brightness of the fog itself, so use it sparingly and check the effect on your LCD.
Composition in fog is about simplicity and isolation. Fog naturally strips away distracting background elements, leaving only the closest subjects visible. Use this to your advantage by placing a single strong subject — a tree, a building, a person, a boat — in the foreground and letting the fog swallow everything behind it. The Japanese aesthetic of "wabi-sabi," finding beauty in imperfection and impermanence, is perfectly suited to fog photography. In Kyoto, I photographed the bamboo grove of Arashiyama in morning fog, and the reduced visibility turned the normally crowded tourist site into a meditative, almost empty space with bamboo stalks emerging from white nothingness in every direction. That image remains one of my personal favorites because it captures a feeling that a clear day never could.
Rain Photography: Reflections and Color
Rain creates two photographic opportunities that do not exist in dry weather: reflections on wet surfaces and saturated colors. Pavement, cobblestones, tiled floors, and any other smooth surface becomes a mirror after rain, and the reflections add depth, symmetry, and visual interest to otherwise ordinary scenes. After a rainstorm in Venice, I photographed the Piazza San Marco from a low angle, capturing the Basilica reflected in the flooded pavement. The reflection was slightly distorted by the shallow water, creating a painterly effect that a perfectly calm canal could never produce. The key is to get low — the lower your camera, the more of the reflection you capture relative to the subject itself.
Colors become more vivid when surfaces are wet. Red brick walls, green leaves, blue painted doors, and yellow taxis all look richer and more saturated after rain because the water fills the microscopic texture of the surface, reducing scattered light and allowing more of the true color to reach your eye (and your camera sensor). This effect is most pronounced in overcast light, which is already ideal for photography because the clouds act as a giant diffuser, eliminating harsh shadows and producing even, flattering light. If you have ever wondered why professional photographers say "cloudy days are the best days for shooting," this is why — the combination of wet surfaces and soft light produces colors that are simply impossible in bright sunlight.
For street photography in the rain, embrace the umbrellas. Umbrellas add color, pattern, and human interest to rainy scenes. A sea of black umbrellas in Tokyo's Shibuya crossing, a single red umbrella on a grey Kyoto street, a transparent umbrella framing a couple's faces in Hanoi — umbrellas are visual gifts. Shoot from sheltered positions — doorways, shop awnings, bus stops, and covered walkways all provide dry vantage points with clear views of the street. Use a fast shutter speed (1/500 second or faster) to freeze raindrops in mid-air, which creates a sense of texture and atmosphere. A slower shutter speed (1/60 to 1/125 second) turns raindrops into streaks, which conveys motion and energy. Both approaches work; choose based on the mood you want to create.
Post-Processing Weather Photographs
Weather photographs often need more post-processing than images shot in clear conditions because the Active range is higher — bright skies next to dark foregrounds, reflections that are brighter than their subjects, and fog that can look flat and grey in a straight file. In Lightroom or Capture One, start by adjusting the white balance — cloudy and rainy conditions often produce a cool blue cast that you may want to warm up slightly by moving the temperature slider toward yellow. Then work on exposure: bring down the highlights to recover detail in bright skies and clouds, and lift the shadows to reveal detail in dark foregrounds.
Clarity and dehaze sliders are powerful tools for weather photography. The clarity slider adds mid-tone contrast, which can make cloud structures more defined and rain more visible. The dehaze slider cuts through atmospheric haze and fog, revealing detail that is hidden in the flat tones. Use both sparingly — too much clarity makes the image look unnatural and "crunchy," and too much dehaze can make fog look like smog. I typically apply clarity at +15 to +25 and dehaze at +10 to +20, then fine-tune by eye. For monsoon and rain images, a slight vignette (darkening the edges) draws the viewer's eye toward the center of the frame and adds drama.
Black and white conversion works exceptionally well for storm and fog photographs because the absence of color forces the viewer to focus on the tonal range, texture, and composition. A dark, brooding storm cloud that looks muddy in color can become a powerful graphic element in black and white. I use the HSL panel in Lightroom to convert selectively — desaturating all colors except one can create a striking effect where a single element (a red umbrella, a yellow taxi, a green field) stands out against a monochrome background. This technique is overused in travel photography, so apply it sparingly and only when the single color genuinely adds something to the composition.
Best Destinations for Weather Photography
Some destinations are defined by their weather, and for a photographer interested in dramatic conditions, these places are worth building a trip around. Iceland is perhaps the best weather photography destination in the world — the combination of rapidly changing conditions, dramatic Scene, and relatively accessible locations makes it possible to photograph rain, fog, snow, and clear skies in a single day. The South Coast, from Vik to Jokulsarlon, offers black sand beaches, glaciers, waterfalls, and icebergs, all of which look completely different in various weather conditions. A rental car costs about $60 per day, and a hotel room outside Reykjavik runs $120 to $200 per night in summer.
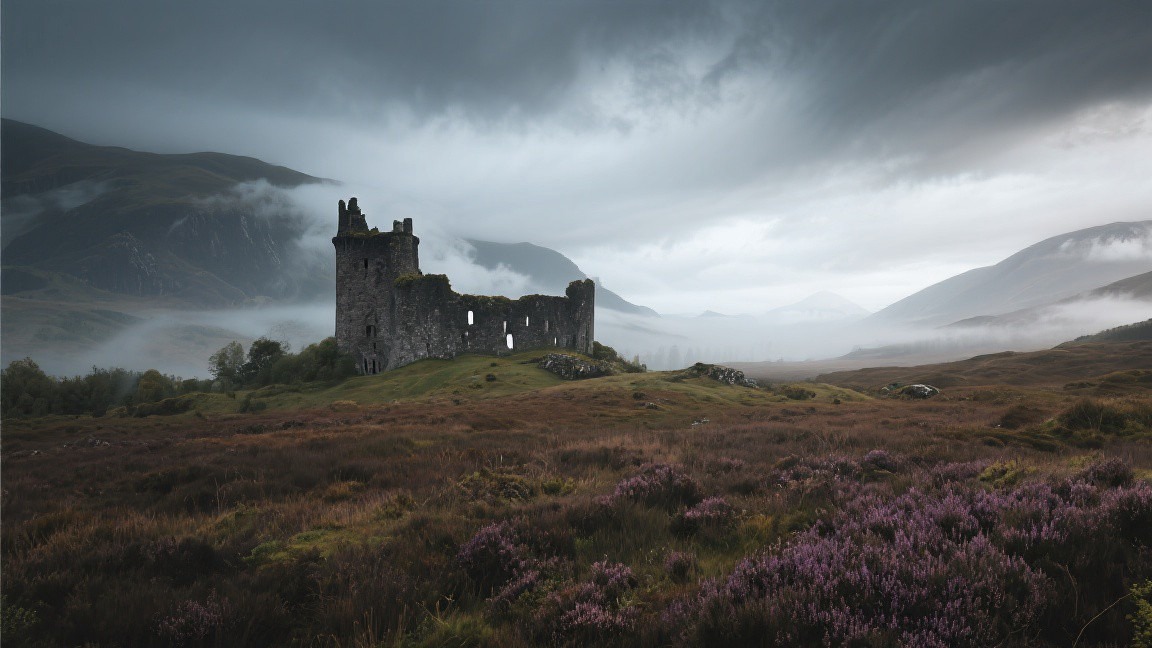
The Scottish Highlands offer some of the most atmospheric weather photography in Europe. Rain, wind, fog, and occasional breaks of brilliant light create a constantly changing canvas. The Isle of Skye is the standout destination — the Old Man of Storr, the Quiraing, and the Fairy Pools all look their best in moody, overcast conditions. I visited in October and had four days of rain and fog, which sounds miserable but produced my best images of the trip. The Scene is so dramatic that even flat grey light creates compelling photographs. A bed and breakfast on Skye costs about 80 to 120 British pounds per night, and the island is small enough to explore by car in two or three days.
For tropical storm photography, the Philippines during typhoon season (July to October) and the Caribbean during hurricane season (August to October) offer raw power, but both carry genuine safety risks. A safer option is to chase storms in the American Great Plains during spring (April to June), where organized storm-chasing tours with experienced guides take you to the best locations for supercell thunderstorms, tornadoes, and spectacular cloud formations. Companies like Tempest Tours and Silver Lining Tours charge $3,000 to $4,000 for a 10-day chase, including hotels, vehicle transport, and expert guidance. You will not always see a tornado, but you will almost always see dramatic storms and extraordinary light.