I spent three years taking travel photos that looked fine on Instagram but fell apart the moment I tried to present them as a coherent body of work. It wasn't a gear problem or a technical problem — it was a curation problem. I was shooting everything and organizing nothing, which meant my best images were buried under hundreds of mediocre ones. The turning point came when a photo editor at a travel magazine looked at my Instagram feed and said, 'You have good individual shots, but I can't tell what kind of photographer you are.' That stung, but it was exactly what I needed to hear. Building a portfolio isn't about accumulating images — it's about making clear decisions about who you are as a photographer and what you want to say.
"Your first 10,000 photographs are your worst." — Henri Cartier-Bresson
Defining Your Photography Identity
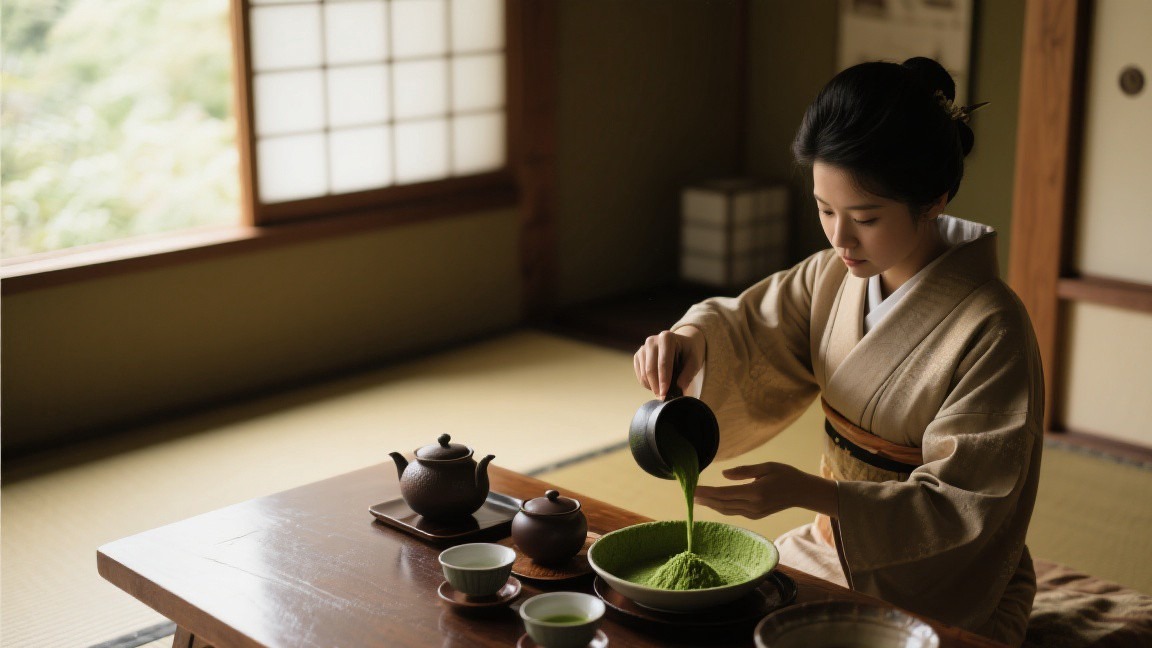
Before you choose a platform or design a layout, you need to figure out what kind of travel photographer you actually are. This sounds obvious, but it took me a long time to internalize. I was trying to be a Scene photographer, a street photographer, a food photographer, and a portrait photographer all at once, and the result was a portfolio that felt scattered and unfocused. The exercise that finally clarified things for me was this: I printed fifty of my favorite images, spread them on the floor, and looked for patterns. The images that held my attention longest were almost all environmental portraits — people in their workplaces, markets, and homes, photographed with natural light and a medium telephoto lens. That was my identity, and I'd been hiding it under a pile of sunset shots and food close-ups.
Once you've identified your core strength, build your portfolio around it. A strong portfolio is not a collection of your best work from every category — it's a focused statement about what you do better than most other photographers. If your strength is Scene, show Scene. If it's street photography, show street photography. If it's environmental portraiture, show portraits. A portfolio of twenty exceptional images in a single genre will always be more impressive than a portfolio of forty good images across five genres. Curators, editors, and clients are looking for photographers with a clear point of view, not generalists who can shoot anything adequately.
Your portfolio should also reflect where you've been and where you want to go. If you want to be hired for assignments in Southeast Asia, your portfolio should demonstrate that you've already produced strong work there. If you want to shoot for outdoor brands, show adventure and Scene images from the kind of environments those brands operate in. A portfolio is both a record of what you've done and a pitch for what you want to do next. Make sure those two things align.
Choosing the Right Platform
There are more portfolio platforms available now than ever before, and the right choice depends on your goals, your budget, and how much control you want over the presentation. I've used three platforms seriously over the past five years: Squarespace, Format, and a self-hosted WordPress site. Squarespace ($16 to $26 per month) is the easiest to set up and maintain, with clean templates that look professional with minimal customization. Format ($12 to $25 per month) is designed specifically for photographers and offers better image presentation tools, including proofing pages and client galleries. WordPress (free software, but you pay for hosting and a domain) gives you the most control but requires the most technical skill.
For most travel photographers starting out, I'd recommend Squarespace or Format over WordPress. The templates are designed by professionals, the hosting is reliable, and you can have a polished portfolio live within a day. I used Squarespace for two years and was happy with it — the only reason I switched was that I wanted more control over the page speed and image delivery, which matters for SEO. My current WordPress site costs about $15 per month for hosting (through SiteGround) and $12 per year for the domain. The initial setup took a weekend, and I spend about an hour per month on maintenance.
Whatever platform you choose, prioritize clean design and fast loading. Your images should be the star of the show, not the website template. Avoid auto-playing slideshows, background music, and complex navigation. A simple grid layout with large thumbnails, a clean project page for each gallery, and an about page with contact information is all you need. Test your site on a slow mobile connection — if it takes more than three seconds to load, you're losing visitors. Compress your images using tools like TinyPNG or Squarespace's built-in optimization, and aim for file sizes under 500 KB per image for web display.
Curating and Sequencing Your Work
Curation is the hardest and most important part of building a portfolio, and it's where most photographers fall short. The natural impulse is to include every image you're proud of, but a portfolio with too many images dilutes the impact of your strongest work. I follow a simple rule: if I'm unsure whether an image belongs in the portfolio, it doesn't. A portfolio of fifteen images that are all exceptional will always be stronger than a portfolio of thirty images where five are weak. Be ruthless. Ask a photographer whose work you respect to review your selection and tell you which images they'd cut. Their answers will surprise you.
Sequencing — the order in which images appear — matters more than most people realize. The first image in your portfolio sets the tone and creates expectations for everything that follows. I open with my strongest single image, a portrait of a Hmong woman in northern Vietnam that I shot during golden hour with a 85mm lens at f/2.0. The image has depth, emotion, and technical quality, and it communicates immediately that this is a portfolio about people and places. The second image should complement the first without repeating it — if the first is a portrait, the second might be a wider environmental shot. The third should add a different texture or mood. Think of your portfolio as a visual narrative with its own rhythm and pacing.
I organize my portfolio into projects rather than individual images. Each project represents a specific trip, region, or theme, and contains eight to fifteen images that tell a story together. My current portfolio has six projects: 'Northern Vietnam,' 'Moroccan Medinas,' 'The Japanese Coast,' 'Andean Markets,' 'Kerala Backwaters,' and 'Iceland in Winter.' Each project page has a brief written introduction — two or three sentences that provide context — followed by the image sequence. This project-based structure gives visitors a reason to stay on the site longer and engage more deeply with the work.
Essential Gear for Travel Photography
More gear does not make you a better photographer, but having the right gear for the way you work makes a real difference in consistency and reliability. After years of experimenting with different setups, I've settled on a kit that covers 95 percent of what I encounter while traveling: a Sony A7 IV full-frame mirrorless body, a 24-70mm f/2.8 zoom for general use, a 85mm f/1.8 prime for portraits, and a 16-35mm f/4 wide-angle for Scene and interiors. The entire kit, including a small tripod and spare batteries, fits in a Tenba BYOB camera bag that fits under the seat in front of me on airplanes.
The single most important accessory for travel photography is a good tripod. I use a Peak Design Travel Tripod (carbon fiber, $379), which collapses to 39 centimeters and weighs just 1.27 kilograms. It's stable enough for sharp exposures at sunset and sunrise, light enough that I carry it without thinking twice, and compact enough to fit in my daypack. A tripod allows you to shoot in low light without cranking up the ISO, to create long exposures that smooth water or blur clouds, and to ensure pixel-perfect sharpness in Scene images. If you buy only one piece of gear this year, make it a tripod.
For backup and storage, I carry a Samsung T7 Shield portable SSD (1 TB, $110), which is small enough to fit in a shirt pocket and fast enough to transfer a full day's RAW files in minutes. I back up to the SSD every evening and keep a second backup on Google Photos (which offers free unlimited storage for compressed images). Losing a day's worth of images because of a stolen camera or a corrupted memory card is a risk I'm not willing to take. I also carry two 128 GB SD cards and swap them at midday — that way, even if one card fails, I only lose half a day's work.
Post-Processing Workflow That Scales
A consistent post-processing workflow is essential for producing a cohesive portfolio, and it's something I wish I'd developed much earlier. I use Adobe Lightroom Classic ($10 per month as part of the Photography plan) for all of my editing, and I've built a set of custom presets that give my images a consistent look while still allowing for individual adjustments. My base preset applies a slight warmth to the shadows, a gentle S-curve for contrast, and a small reduction in highlights. From there, I adjust exposure, white balance, and color grading individually for each image. The entire process takes me about three to five minutes per image.
The key to an efficient workflow is to cull aggressively before you start editing. When I return from a trip, I import all my RAW files into Lightroom and immediately go through them in survey mode, flagging only the images that genuinely excite me. From a typical day of shooting — 200 to 400 frames — I'll flag maybe 20 to 30. From those, I'll select 5 to 10 for full editing. The rest are archived but never touched again. This ruthless culling process means I spend my editing time on the images that have the most potential, rather than wasting hours trying to rescue mediocre shots.
For images that need more intensive editing — heavy retouching, compositing, or creative effects — I round-trip to Adobe Photoshop, which is included in the same Photography plan. Photoshop is necessary for maybe 5 to 10 percent of my final images. The rest are handled entirely in Lightroom. I've tried Capture One and found it technically superior in some ways, but Lightroom's ecosystem — the mobile app, the cloud sync, the integration with Photoshop — keeps me in the Adobe workflow. The best editing software is the one you actually use consistently, not the one with the most features.
Getting Your Work Seen
A portfolio that nobody sees is just a personal archive. Getting your work in front of the right people requires a combination of online presence, personal outreach, and community engagement. Instagram remains the most important social platform for travel photographers, not because of its algorithm or its features, but because it's where photo editors, art directors, and fellow photographers spend time. I post three to four times per week, use a consistent editing style, and engage genuinely with other photographers' work. I've gotten two paid assignments and one magazine feature directly from Instagram DMs.
Personal outreach to editors and art directors is uncomfortable but effective. I keep a spreadsheet of publications and brands I'd like to work with, along with the names of their photo editors and creative directors. Every month, I send three to five personalized emails introducing myself and linking to my portfolio. The emails are short — three paragraphs at most — and include a specific reason why I think my work would be a good fit for their publication. The response rate is low, maybe 10 to 15 percent, but the responses I do get have led to real opportunities. One cold email to the photo editor at AFAR magazine resulted in a three-day paid assignment in Oaxaca.
Photography competitions and grants are another way to gain visibility. I've entered the Travel Photographer of the Year competition ($30 entry fee), the Sony World Photography Awards (free entry for open category), and the Alexia Foundation grants (free entry). I've never won, but I was shortlisted for the Sony awards in 2024, which gave me a credential and a portfolio feature on their website that drove significant traffic to my site. Look for competitions that offer exposure rather than just prizes — the portfolio features, exhibition opportunities, and publication credits are often more valuable than the cash awards.
Pricing and Licensing Your Work
Pricing travel photography is one of the most confusing aspects of the business, and there's no single formula that works for every situation. The approach that has worked best for me is to price based on usage, not based on my costs or my time. A full-page editorial image in a major travel magazine typically pays $200 to $500, depending on the publication and the circulation. A web-only usage might pay $50 to $150. A commercial license for advertising use — a hotel website, a tourism campaign — can pay $500 to $2,000 or more, depending on the scope and duration of the license. I use the Getty Images pricing calculator as a benchmark, even though I don't license through Getty.
Always clarify the usage rights before agreeing to a price. Some publications request exclusive rights, which means you can't license the same image to anyone else for the duration of the agreement. Exclusive usage should command a premium of 50 to 100 percent over non-exclusive rates. Some publications request all-rights buyouts, which means you surrender ownership of the image entirely. I almost never accept buyouts, because the long-term value of retaining ownership of your best images far exceeds the short-term payment. A single image can generate licensing income for years if you retain the rights.
For stock photography, I license a selection of my images through Getty Images and Shutterstock. The income per download is small — typically $0.25 to $5 for Getty and $0.10 to $2 for Shutterstock — but the volume adds up over time. My top-performing image, a shot of the Blue City in Jodhpur, has earned about $1,200 over three years from stock licensing alone. I upload maybe 10 to 15 images per month to each platform, focusing on images that are commercially useful (landmarks, cityscapes, food, cultural scenes) rather than my most artistic work. Stock photography is not glamorous, but it provides a steady passive income stream that requires minimal ongoing effort.